When choosing colors and incorporating images in your print project, ensuring you are using CMYK, and not RGB, is critical. RGB is designed for use on computers, as monitors show color as a combination of red, green, and blue light. RGB colors may not translate correctly to CMYK, which can lead to unexpected color changes. Printing presses, however, use four colors, cyan, magenta, yellow, and black to print color. Converting your images to CMYK in an image editor, and choosing colors based on CMYK values, will ensure that your project prints with the correct colors.
Designing your own file?
Follow these guidelines for a great finished product.
With over 30 years of printing experience, we are perfectly equipped to be your printer for any print project. We want your pieces to look as amazing as you do, so we have a few guidelines below to make sure the final pieces looks like you expect. Be sure to check your files color settings, image quality and bleeds before you upload your files.
Color Check: RGB vs CMYK colors
Resolution Check: Double check your image size
In the printing process, image resolution is measured in dots per inch or DPI. Pictures with less dots per inch will appear blurry when printed even if they look good on a computer screen. Images need to be at least 150 dpi at full size to reproduce without pixelation. Many images downloaded from the internet will only have 72 DPI which are not suitable to print.
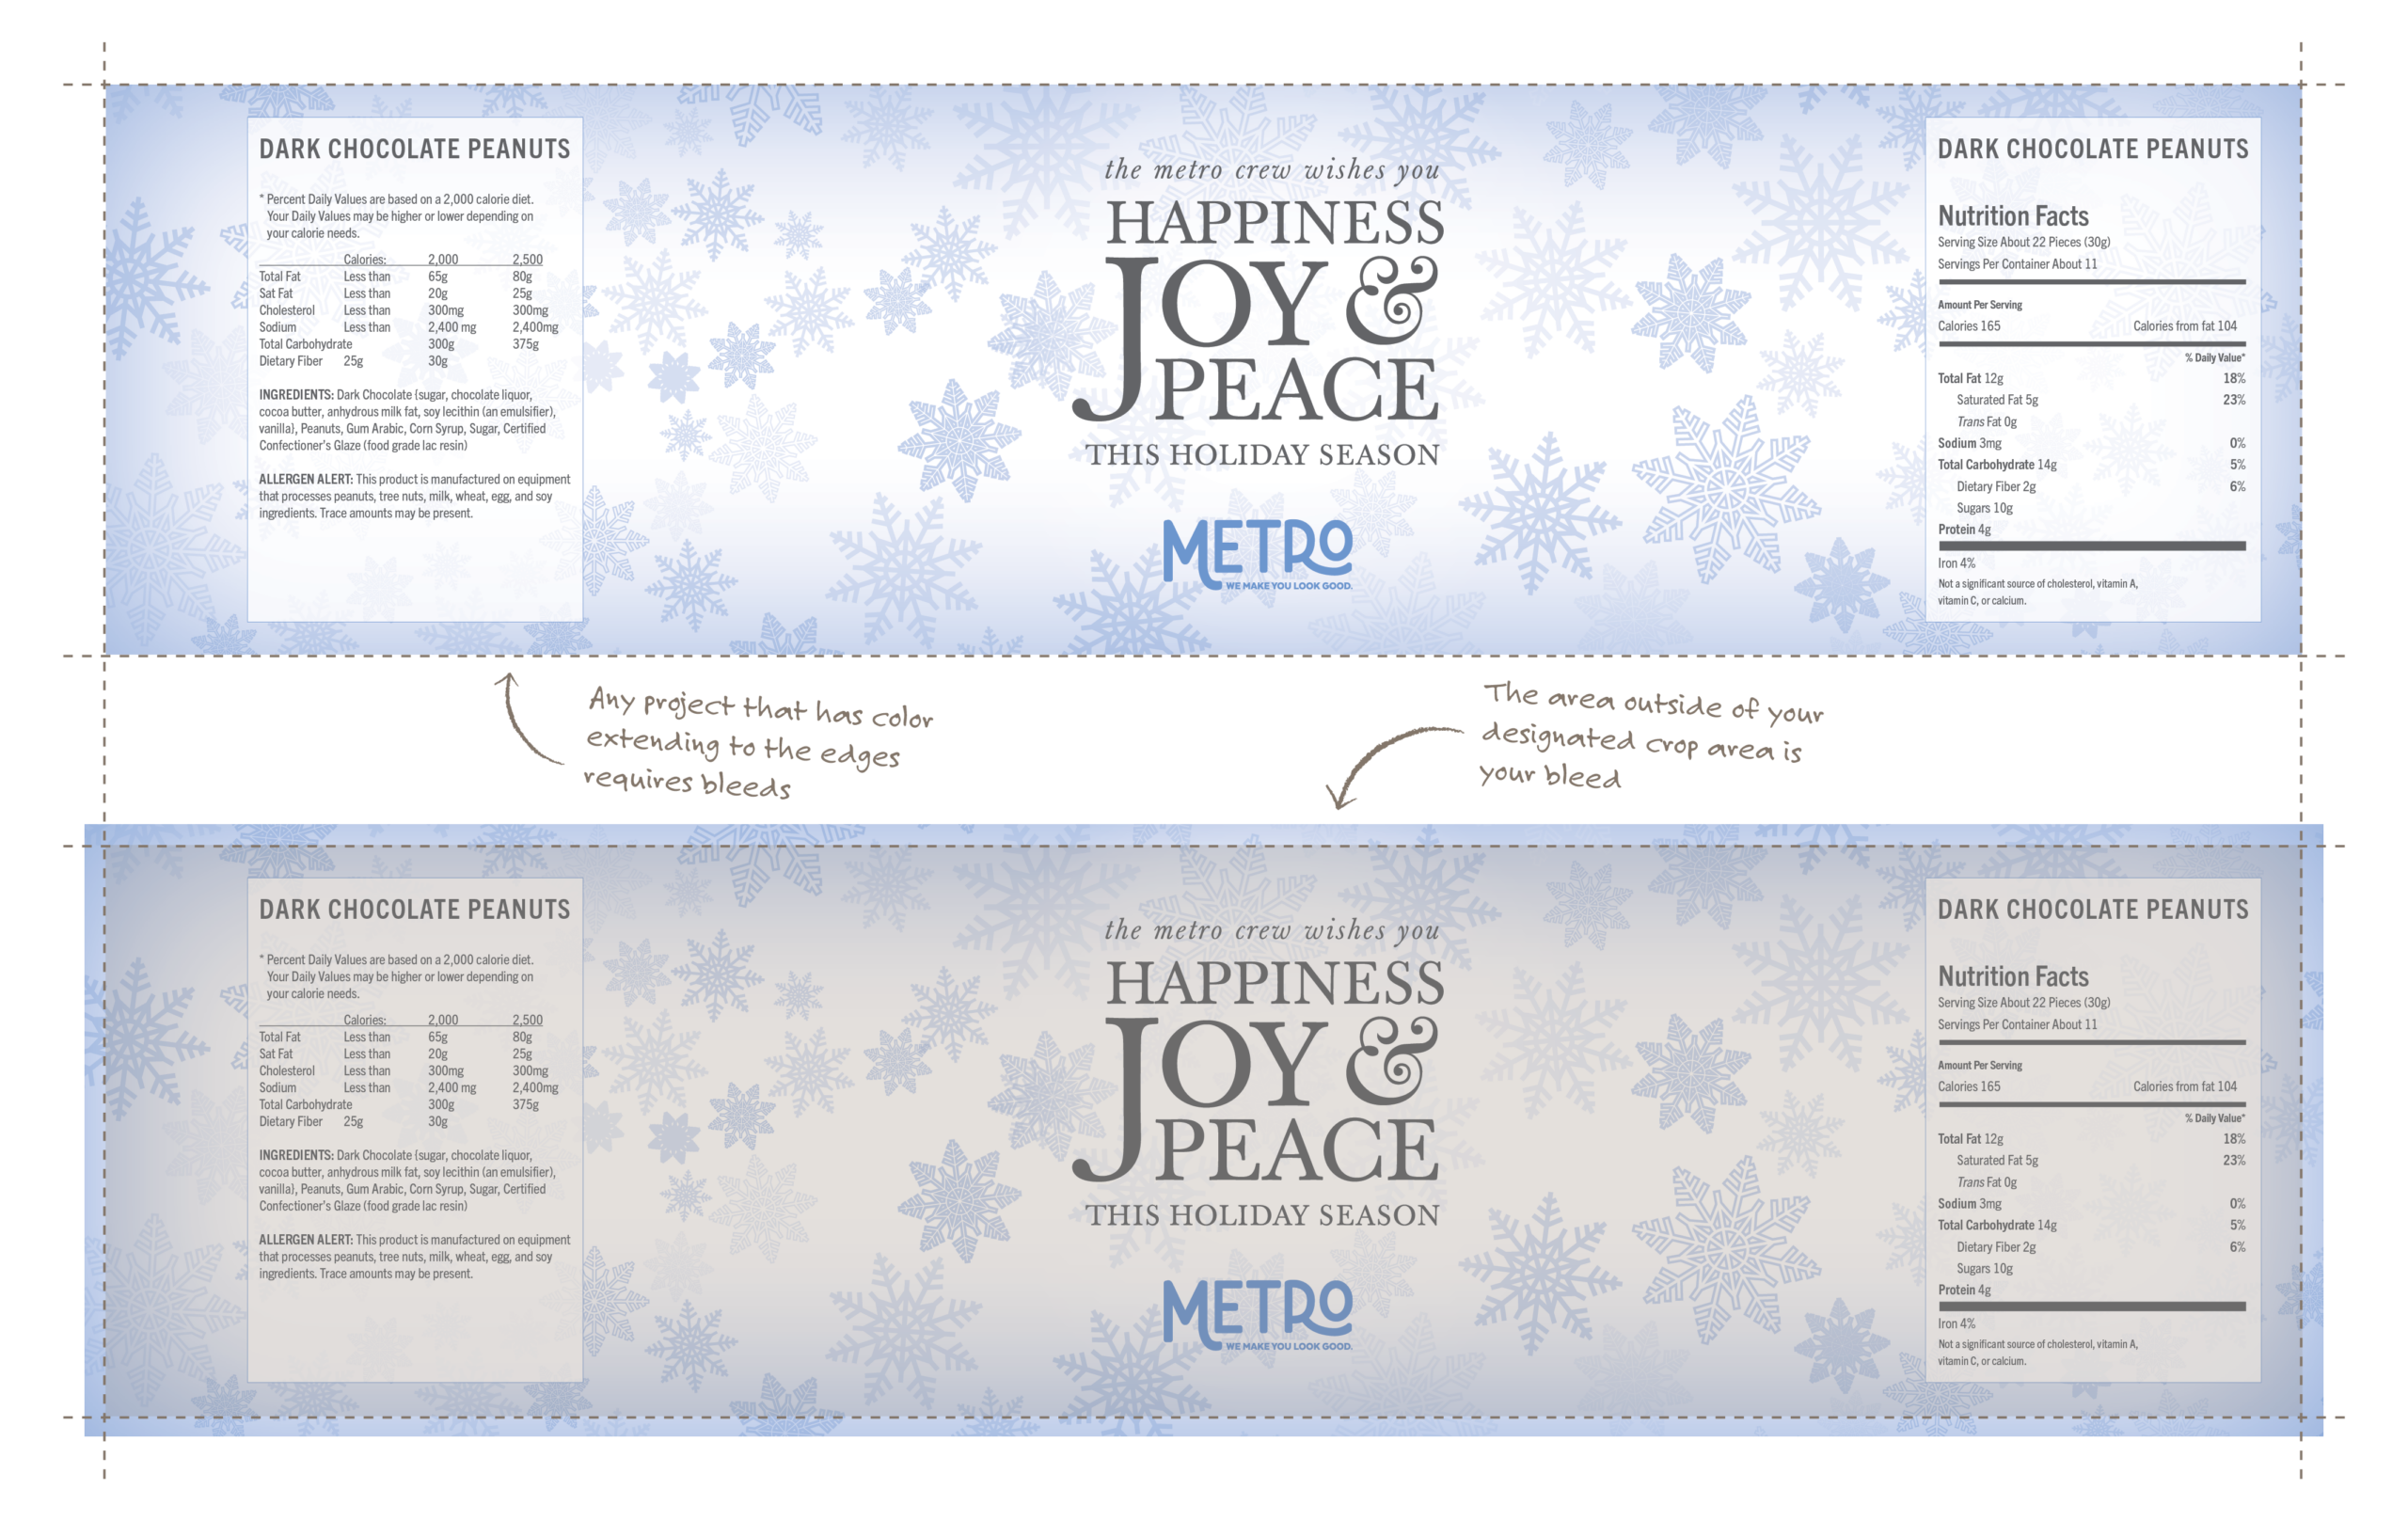
Bleed Check: Do images or colors go to the edge of the sheet?
When colors print to the edge of the page, bleed must be added so no white shows on the edge of the piece. Sheets of paper may not be the exact same size and bindery equipment is only precise up to 1/16 of an inch. Adding bleed to your project guarantees that when your project is trimmed to size, there are no unwanted white edges showing.
Bleed is added to a project by extending colors past the edge of the trim area.
For good measure, bleeds should always be 1/8 of an inch (.125 in) or more.
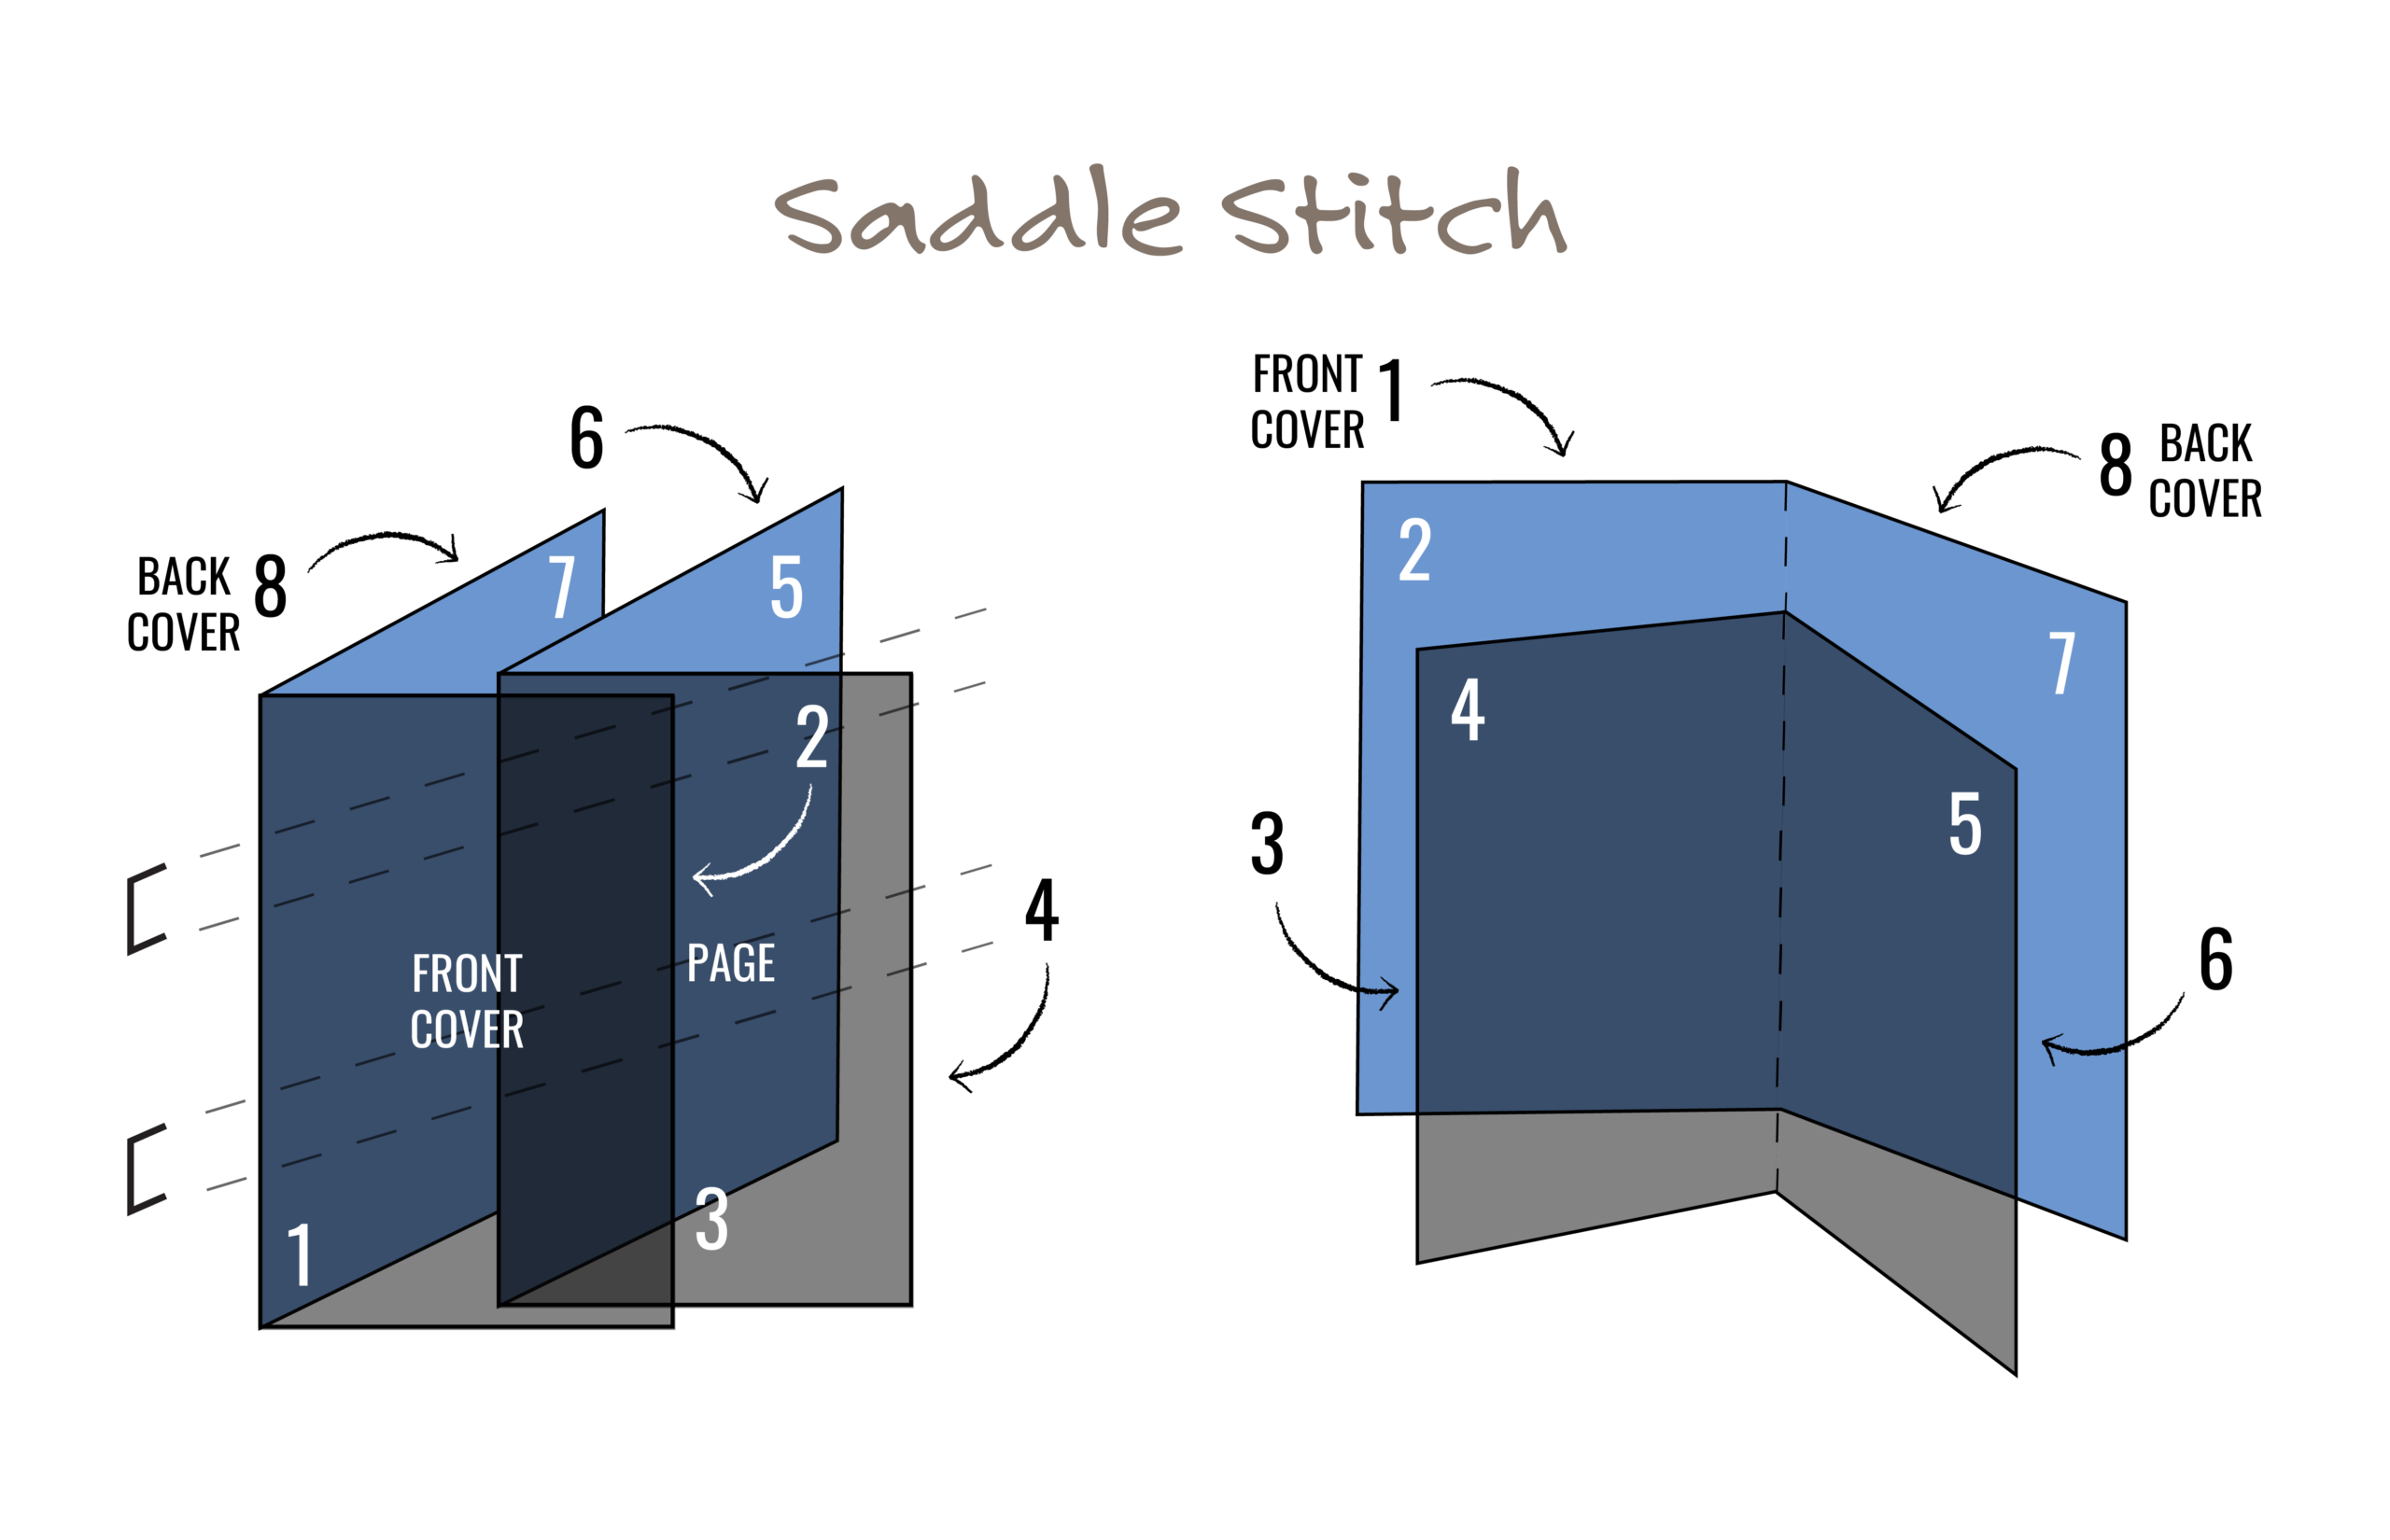
Binding Check: Saddle-Stitching, Page Count & Creep
Saddle-stitching is one of the most common and cost-effective binding methods for multi-page projects such as booklets, magazines, programs, and manuals. Pages are printed on large sheets, folded in half, nested together, and stapled along the spine.
Because of how saddle-stitched pieces are printed, folded, and trimmed, page setup and page count are critical to a clean final product.
Why saddle-stitched projects must be in multiples of 4
Each printed sheet contains four pages—two on the front and two on the back. When the sheet is folded, those pages fall into the correct order (for example: front cover, inside pages, and back cover).
This is why saddle-stitched pieces must have total page counts in multiples of four (4, 8, 12, 16, etc.).
If your file does not meet this requirement, blank pages will need to be added to complete the layout.
Tip: Covers are included in the total page count.
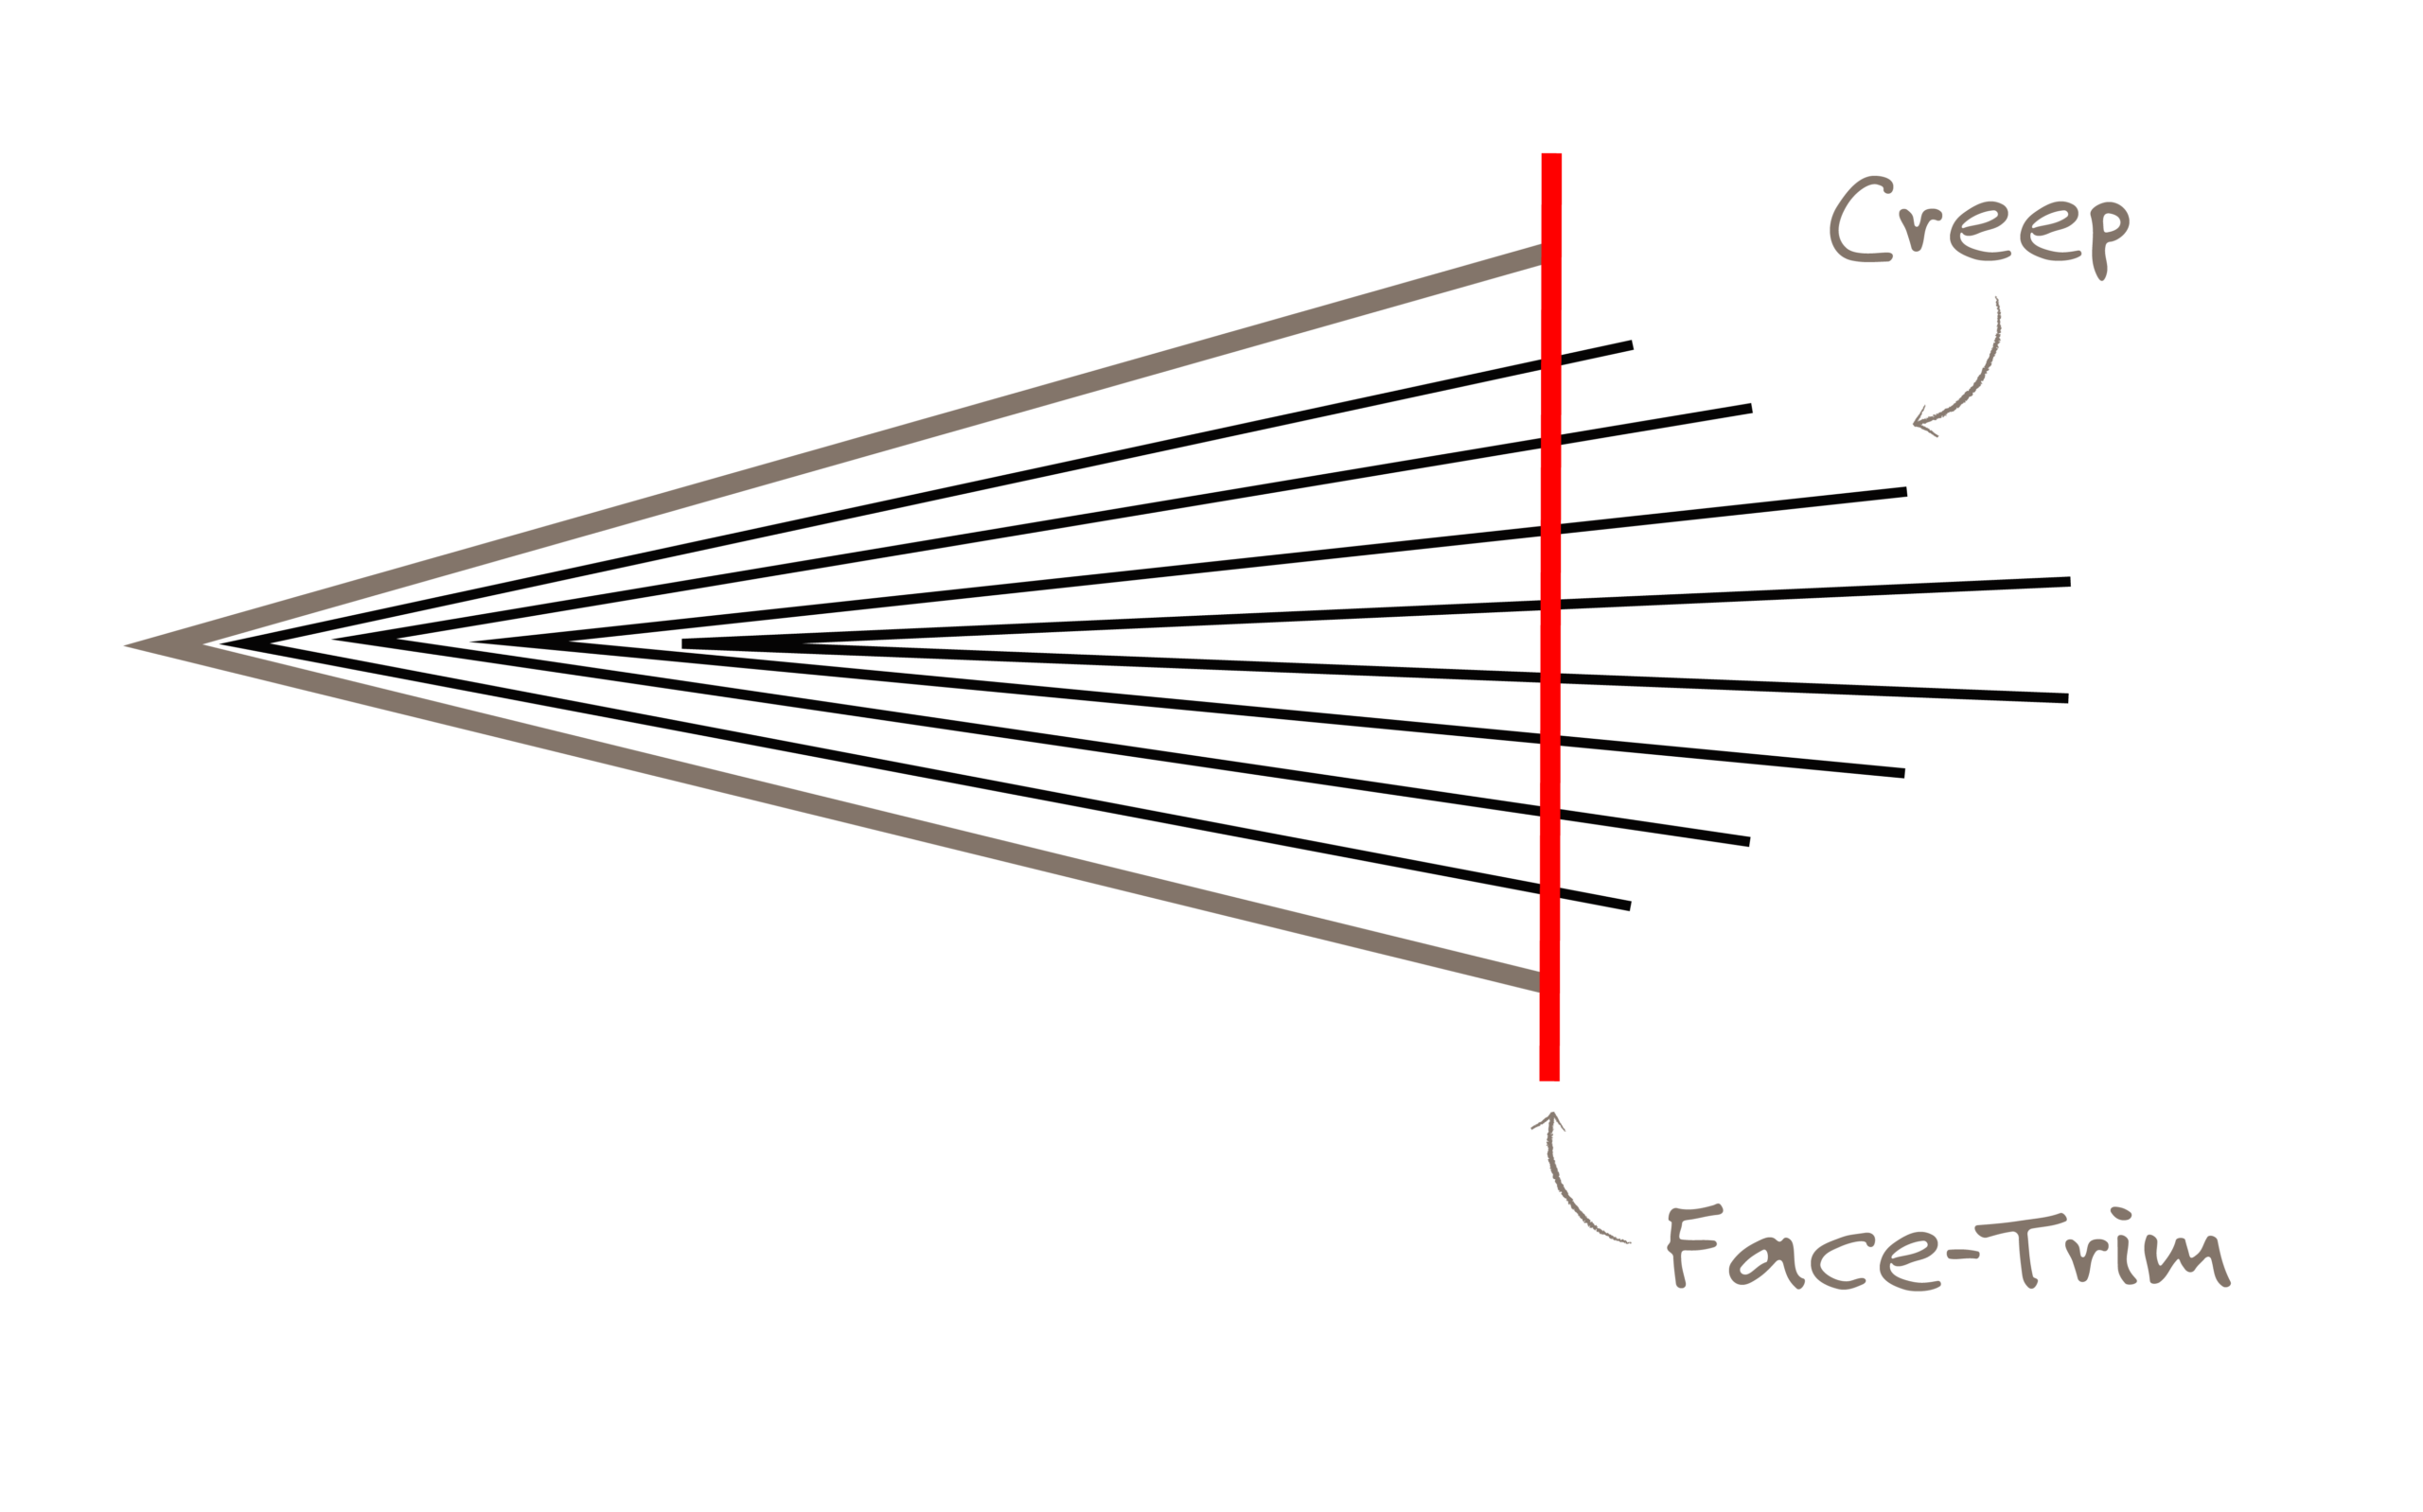
Understanding creep (and why margins matter)
As more pages are nested together, the inner pages are pushed outward slightly. This shift is called creep. When the booklet is face-trimmed, the outer edges of the pages are trimmed evenly—but the inner pages lose slightly more than the outer pages.
If creep is not accounted for:
- Page numbers may appear off-center
- Margins may look uneven
- Important text or graphics near the edge can be trimmed off
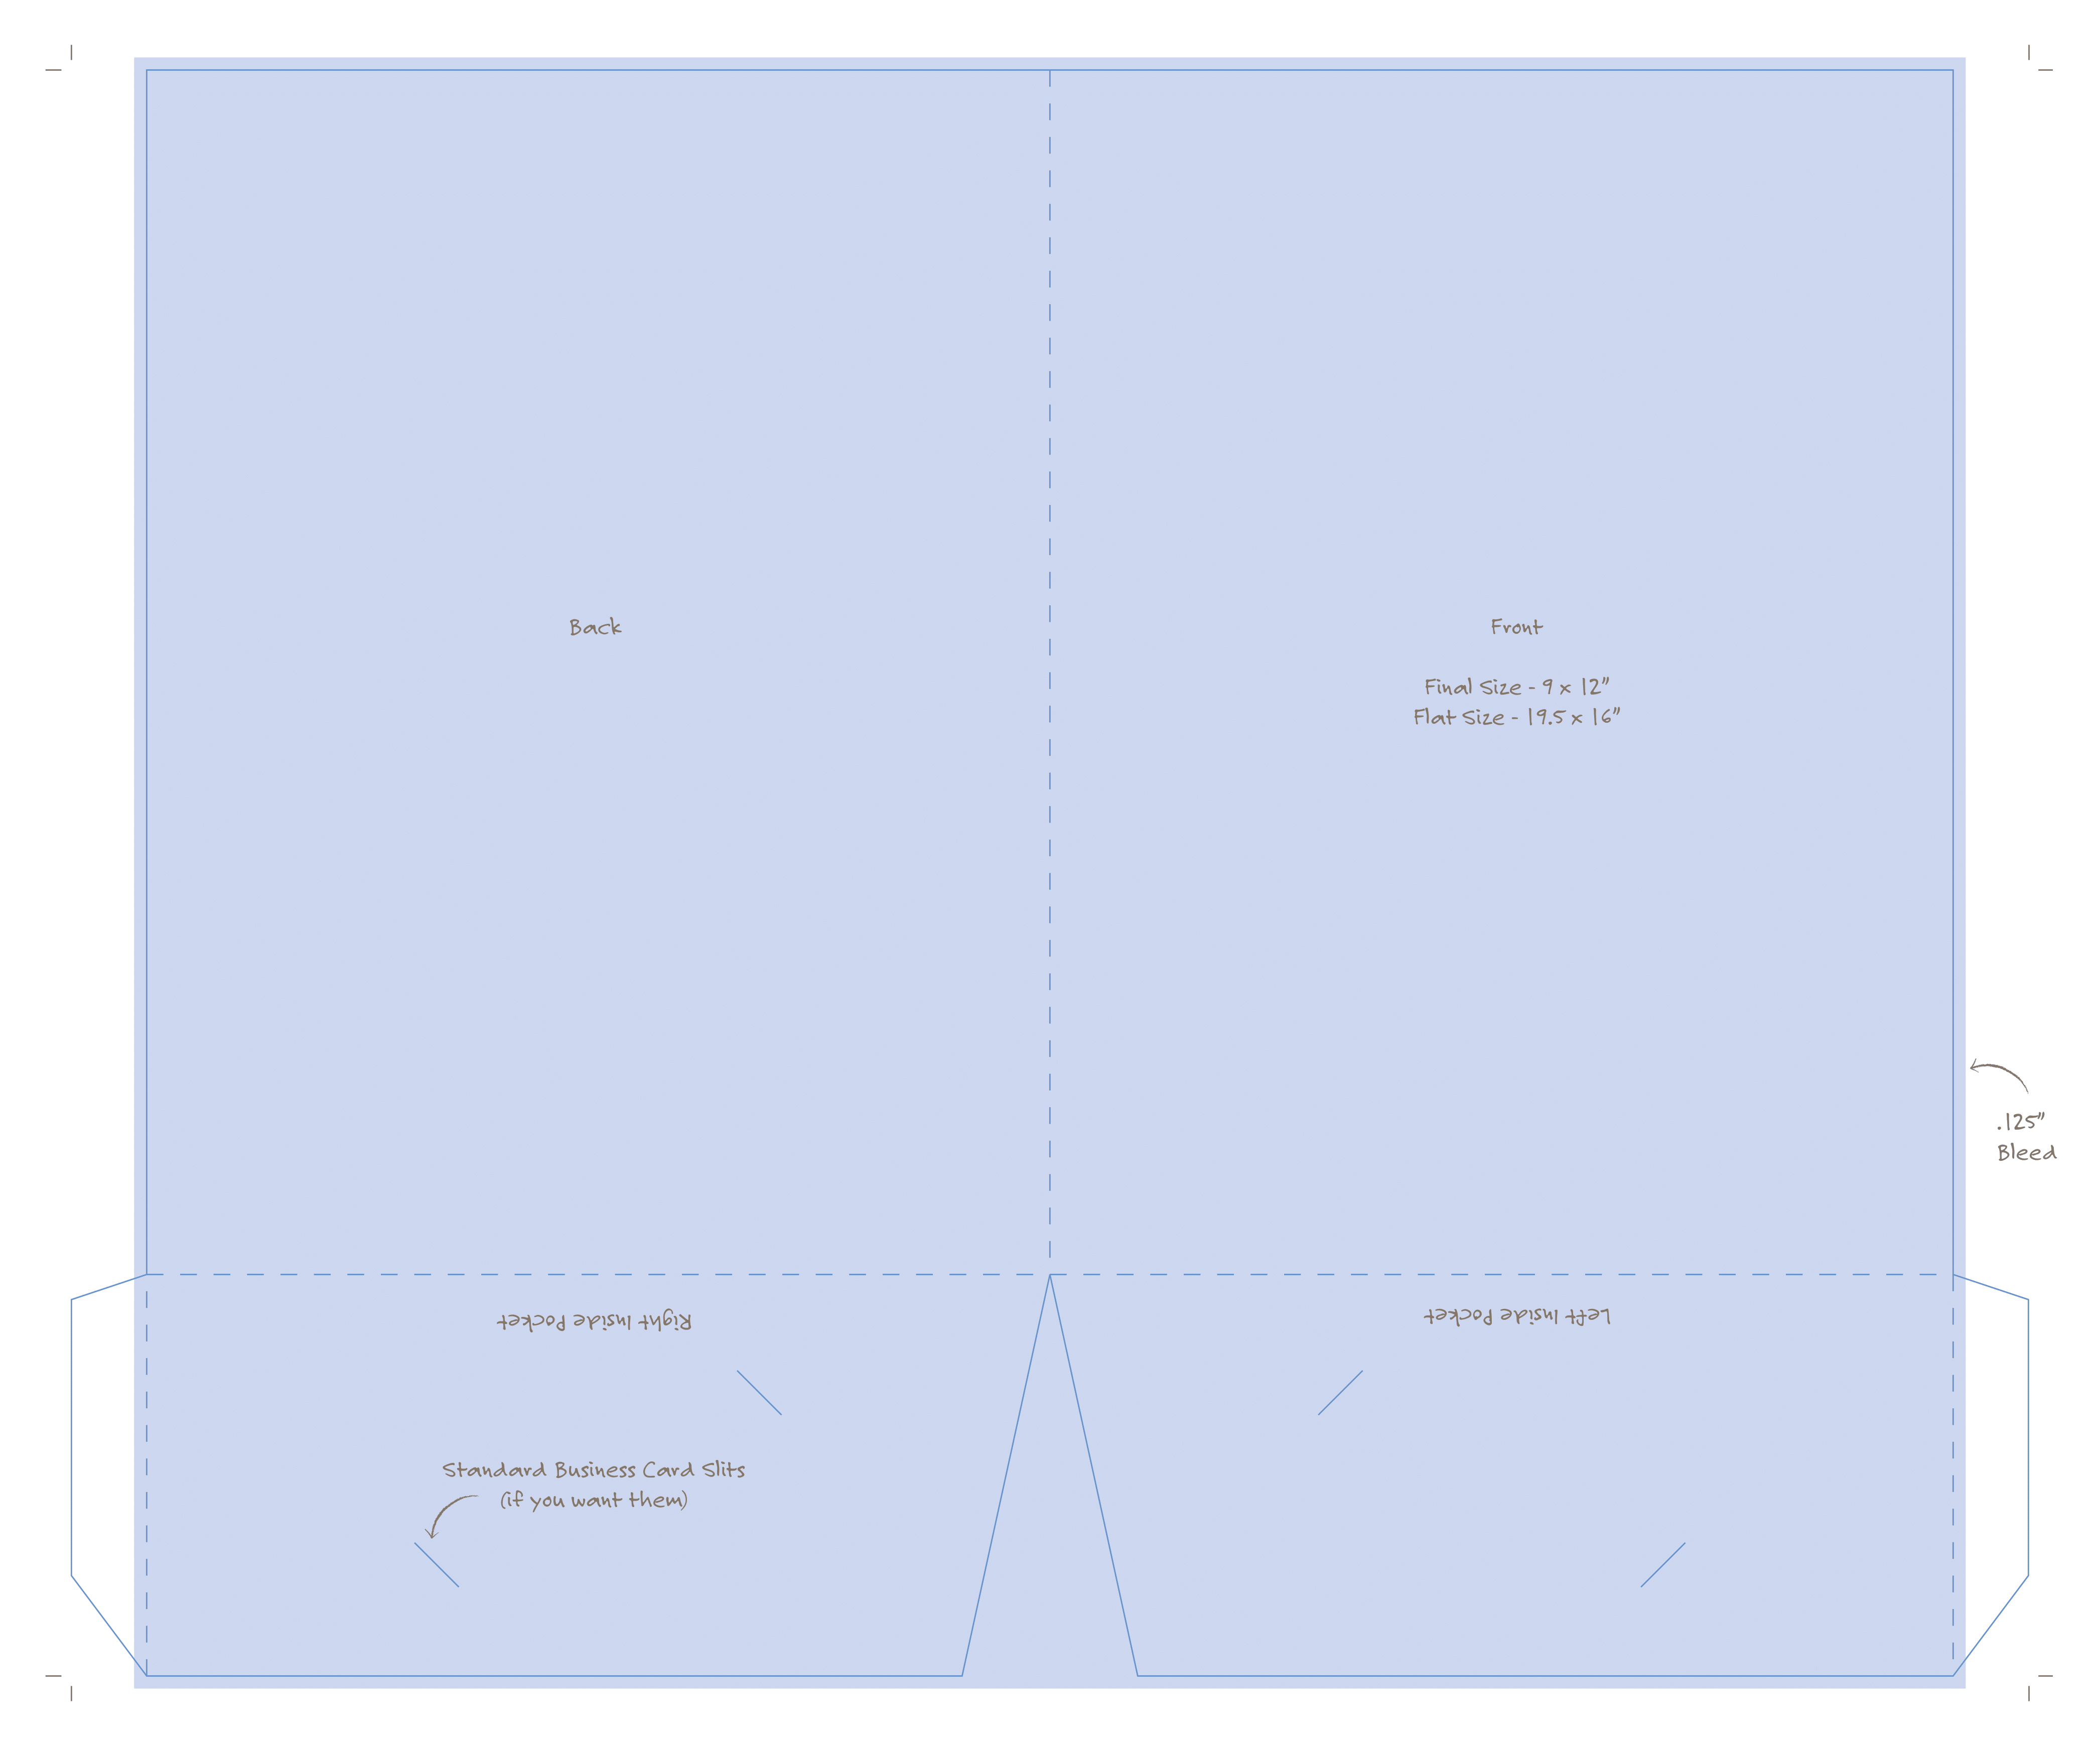
Die Templates: Use the correct layout from the start
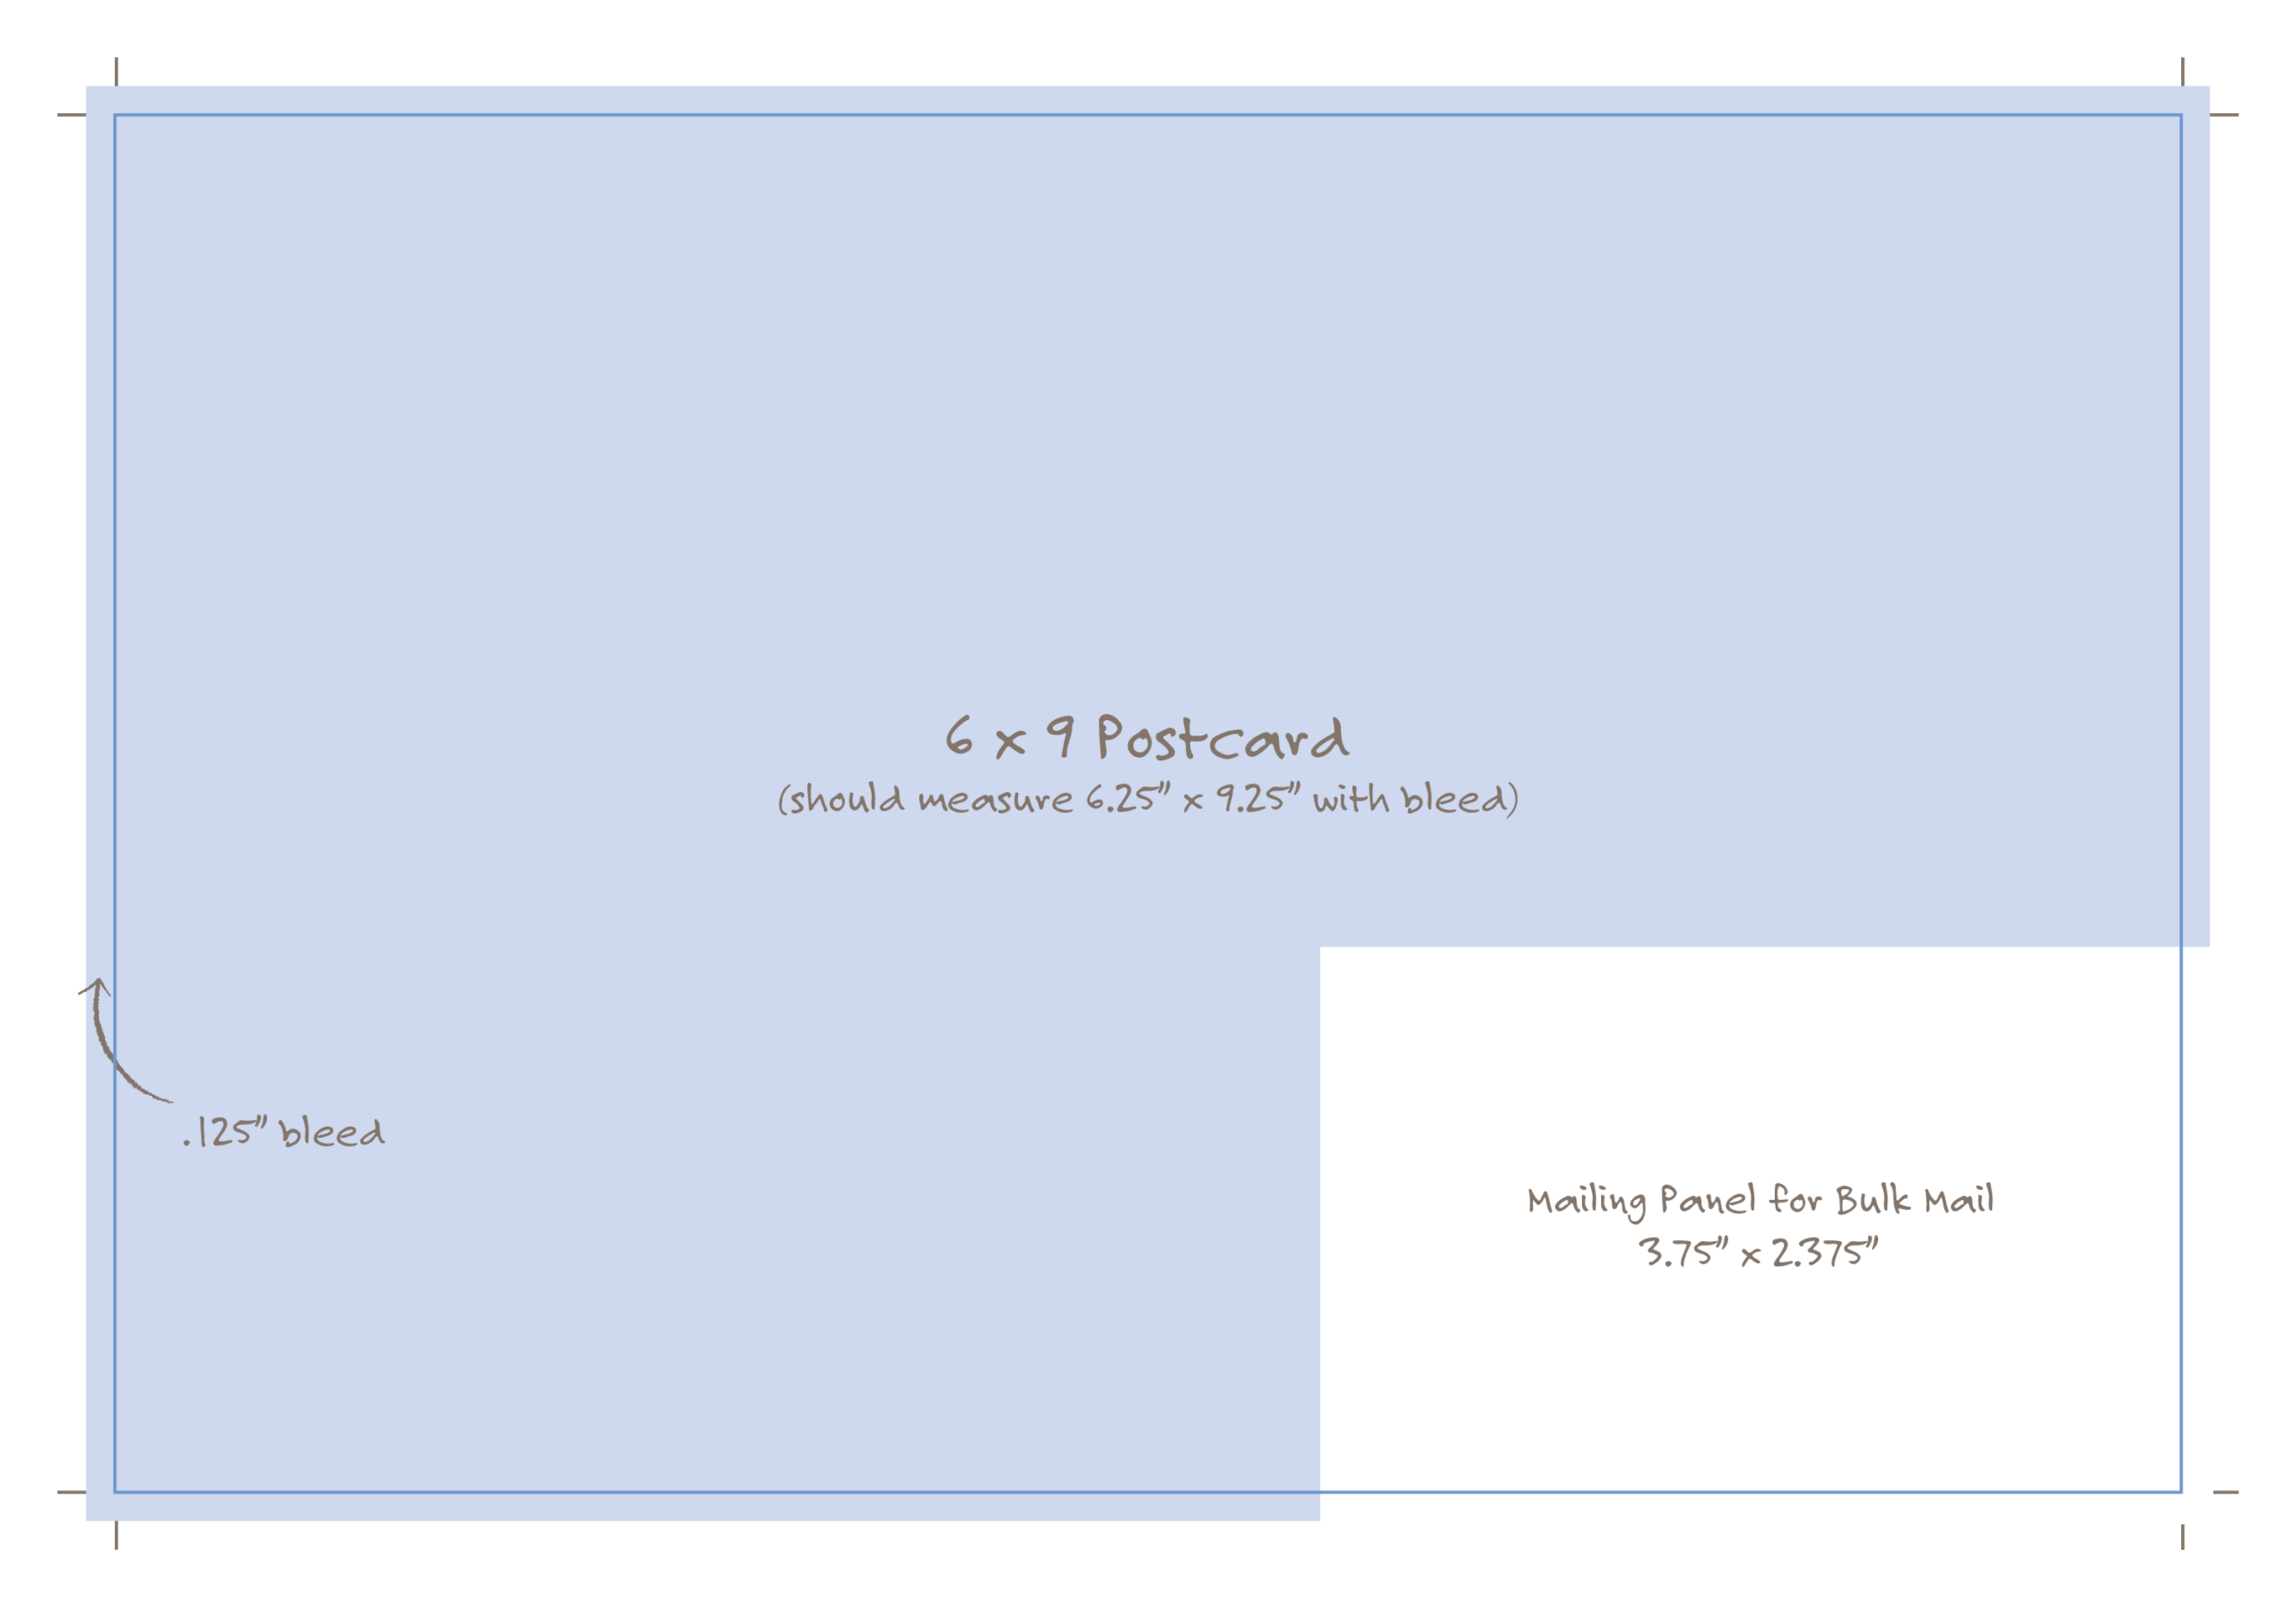
Die templates show the exact cut, fold, and bleed areas for a printed piece. Using the correct template ensures artwork lines up properly and nothing important gets trimmed or folded incorrectly. Folder templates identify spine width, fold panels, and pocket placement, while postcard templates define trim size, bleed, and USPS-safe areas. Always design directly on the provided die template to avoid production delays and costly reprints.
Below are examples of a pocket folder template and a 6×9 postcard template that indicates the mailing panel. Click to download the PDF and place it into your design file to make sure your artwork is set up correctly before submitting.